- What is RabbitMQ
- Environment Setup
- Managing Users and Permissions
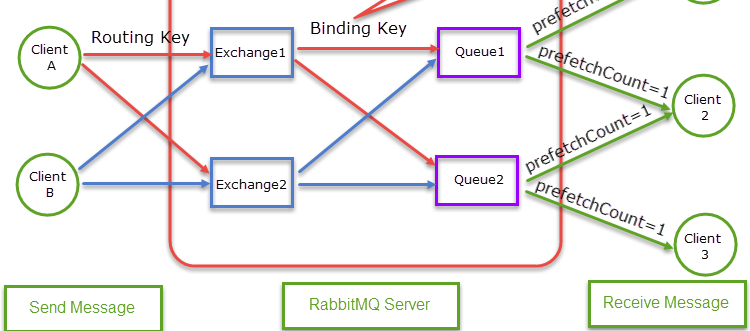
- Scenario: Producer sends messages, Consumer receives messages
- Advanced Features: Ensure Reliable Message Delivery
- Best Practices
What is RabbitMQ?
RabbitMQ is an open source message middleware that implements the AMQP protocol(Advanced Message Queuing Protocol),designed for asynchronous communication in distributed systems.It facilitates asynchronous communication between applications, enabling decoupling and scalable architectures.It supports multiple programming languages and provides features like message persistence, flow control, and cluster deployment, widely used in microservices architecture, asynchronous task processing, and system decoupling.
Core Concepts
| Concept | Description |
|---|---|
| Producer | An application that sends messages to an exchange. |
| Consumer | An application that receives messages from a queue and processes them. |
| Exchange | A component that determines message routing rules and distributes messages to queues based on bindings. |
| Queue | A container for storing messages, from which consumers pull messages. |
| Binding | Establishes a relationship between an exchange and a queue, defining routing conditions (e.g., routing keys). |
| AMQP | An application-layer protocol that defines communication standards for reliable message passing. |
Environment Setup
Docker (Recommended):
Pulling the RabbitMQ Docker Imag
1 | docker pull rabbitmq:management |
Start a RabbitMQ instance and mount a custom configuration file from your host to the container.
1 | docker run -id --name=rabbitmq -v rabbitmq-home:/var/lib/rabbitmq |
- -d runs the container in detached mode.
- –name assigns a name to the container.
- -p maps the ports from the container to your host machine. Port 5672 is for RabbitMQ server, and 15672 is for the management UI.
Access the RabbitMQ Management Console: - Open a web browser and navigate to http://localhost:15672/.
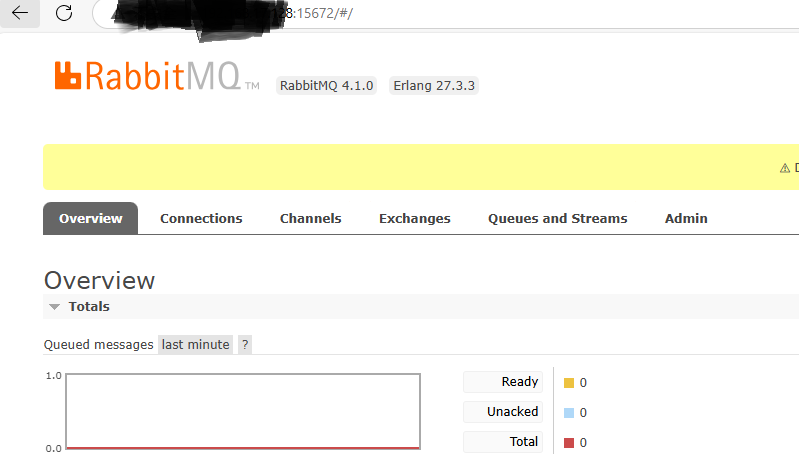
- Log in with the default username you set and password you set in the above command.
Managing Users and Permissions
To add a user, use rabbitmqctl add_user.
To grant permissions to a user in a virtual host, use rabbitmqctl set_permissions:
To list users in a cluster, use rabbitmqctl list_users:
1 | rabbitmqctl list_users |
To delete a user, use rabbitmqctl delete_user:
1 | rabbitmqctl delete_user 'username' |
To revoke permissions from a user in a virtual host, use rabbitmqctl clear_permissions:
1 | rabbitmqctl clear_permissions -p "custom-vhost" "username" |
Scenario: Producer sends messages, Consumer receives messages
Producer Code
1 | class Producer |
Consumer Code
1 | class Consumer |
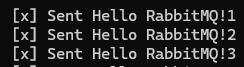
Run the test:
Send a message from the Producer:
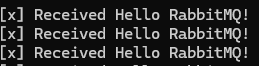
Consumer output:
Advanced Features: Ensure Reliable Message Delivery
Message Persistence
Scenario: Prevent message loss on RabbitMQ restart
- Queue Persistence: Set durable: true when declaring the queue.
- Message Persistence: Set BasicProperties.Persistent = true.
1
2
3
4
5
6// Producer code for persistence
channel.QueueDeclare(QueueName, durable: true, ...);
var properties = channel.CreateBasicProperties();
properties.Persistent = true; // Make messages persistent
channel.BasicPublish(..., basicProperties: properties, ...);
Publisher Confirms
Scenario: Ensure messages reach RabbitMQ server successfully
1 | // Enable publisher confirms |
Manual Consumer Acknowledgment
Scenario: Avoid losing unprocessed messages (e.g., on consumer crash)
1 | // Consumer code with manual acknowledgment (autoAck: false) |
Best Practices
Message Format
Use JSON for structured data, e.g:
1 | { |
Monitoring
- Use the RabbitMQ management dashboard to check queue status, connections, and resource usage.
- Monitor performance with dotnet trace or tools like Prometheus + Grafana.